
Introduction
Google forms can be used for a variety of purposes. In a recent blog, I demonstrated how to utilize Google Forms to create simple survey questions. In this article, I'll show you how to utilize Google Forms to create and distribute research questionnaires. The post would also go on to demonstrate how to export the data into Microsoft Excel.
Getting Started
To get started, you must first develop and finalize your questionnaire. It is not a good idea to write your questions directly into Google Forms—it increases error.
This tutorial would make use of a PC. It is preferable to perform such exercises on a computer rather than a phone.
1. Go to www.forms.google.com
- Your interface should look like this.

2. As seen above, click "start new form." This should take you to the following page:

3. Click on one of the "untitled forms" placeholders, clear the text, and type or copy and paste the title of your questionnaire.


4. Fill in the "Form description" box underneath your title with the introduction or description of your questionnaire. As an example:

5. To insert a new section, click the section symbol at the right in the displayed rectangle menu.

This is how the new section should look:

6. To rename the "untitled section," click on it. If necessary, enter a description; however, this is optional. Here's an example:

MULTIPLE CHOICE AND SHORT ANSWER QUESTIONS
7. You may now begin with your questions.
8. Click on "Untitled Question," then type or paste your question.

9. A. If you wish to measure age in categories, such as 20-30 years, 31-40 years, etc., select "Option 1" and enter your first option.

To add another option, click "Add option." Repeat the process until you have as many options as you like.

B. If you want respondents to enter their true ages, navigate to the drop-down menu button displayed below and adjust the choice.

The options should appear as follows:

Choose the "Short answer" option. This is how it should look:

Respondents can now enter their own response.
NB: Click on the "Required" icon if you want respondents to answer a question (if the question is mandatory).

It should change color and move from left to right, as follows:

10. To ask your next question, click on the “+” icon.

The screen should look like this:

As previously, enter your questions and options.
Continue to add questions until you have completed that section. Then you click the section icon to move on to the next section.
DEALING WITH LIKERT SCALE QUESTIONS
1. Create a new section and name it. Enter the instructions in the description. It should look like this:


2. Click to add a question. The Likert scale's subsection should be placed in the question column.

3. Change "multiple choice" to "multiple choice grid" for the response options.

4. Type your answer options in the "columns" box, for example, strongly agree, agree, neutral, disagree, strongly disagree.

5. Fill in the blanks with your questions in each "row."

6. Make certain that the required button is selected.

USING A RATING/ LINEAR SCALE
This scale is analogous to the Likert scale. The answer option to employ in this scale is the "linear scale," not the multichoice grid.
1. Make a new section and give it a name.

2. Click to add a question. Put the statement or variable in the question column:
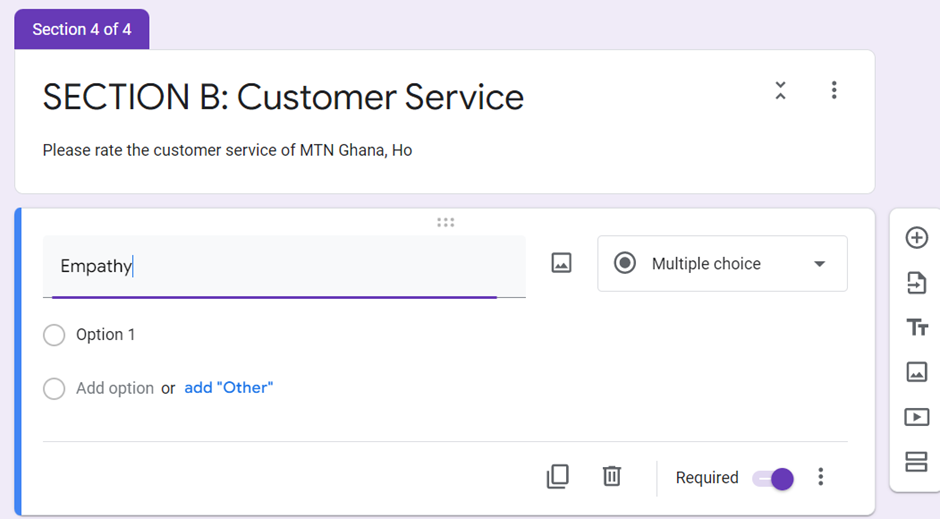
3. Change "multiple choice" to "linear scale" in the answer options.

4. Using the dropdown menus as shown, change the scale's beginning and ending points:


5. Click to add a new question, and then repeat the process until the required number of questions is reached.
DEALING WITH CHECK BOXES (TICK AS MANY AS APPLY)
1. Make a new section and provide a description if necessary.
2. To add a new question, click the icon.
3. Input your question into the question placeholder and add "check all that apply" between brackets.
4. Replace "multiple choice" with "checkboxes" in the menu of available options.

5. Type the first list item into "option 1," the second into "option 2," and so on.

FINALIZING THE FORM
1. Click the send button located in the upper right corner.

2. Select the link button:

3. Click shorten new link, then copy the URL using the copy button below.

4. The copied link can now be shared with respondents via email or social media.
5. With a single click, you may move from the question mode to the responses mode to review the responses as they arrive. As illustrated below:

6. When you have completed data collection (reached your sample size), you must stop accepting responses.

7. Slide to stop accepting responses.
EXPORTING YOUR DATA TO MICROSOFT EXCEL
1. You may be uninterested in the graphs and analysis on the form and would prefer to conduct your own analysis of the data. The data can be exported into Excel for such an activity.

2. Your data will be exported to a new spreadsheet by default. Leave the field unchanged and click "create."

3. The file is created in a new tab in Google Sheets.

4. You can save a copy for use in Microsoft Excel.
- Navigate to the File menu.

- Select “Download” >>> Microsoft Excel (.xls)
- The file downloads and is ready for use.
CONCLUSION
You will uncover additional interesting elements about the form as you practice and utilize it, which will improve the appearance and final output of your work.
ABOUT THE AUTHOR

Comments
~Apenyo Godwin Tettey(B.sc. Agribusiness)